Butler Documentation Wiki
Welcome to the Butler's oficial documentation. If you find something confusing or with a lack of explanation, please, send an email to info@ivgam.com. We try to solve it as soon as possible. Thanks for your collaboration and we hope that this wiki helps you.
Configuration
Databases /app/databases.ini
Butler provides a multi-instance configuration that allows you to
define all the connections that you need. This configuration
is inside the file /app/databases.ini and have
the next structure:
Every block defines one instance. By default, Butler access to the
intance with the name: local.
For create the database connection, Buler use PDO
adapters plus a singleton pattern,
that ensure no open more the one connection for the same instance.
And what happens with the destructor? Don't worry, PDO
close the connection automatically in the destructor method.
For more information about the creation of instances and query execution, click here.
Routes
By default, Butlers works with a generic router that use the next
sintax http://mydomain.com/controller/task ,
where controller is the result of remove
the suffix _controller of our controller,
and task, the name of the public method
that we like to execute.
However, it's possible that we like to create custom routes. For this,
Butler have one file, /app/config/routes.php,
where we can define all the routes that we need. This file, use
the next structure.
Where...
-
controller: Name of the controller that resolve the route (fullname of the class) -
url: An internal name (usefull for the debug) -
regex: The rule that provides the match of the URL -
params: An array that defines all the params that this route receives. If the regex have parenthesis statements ((.*):), the params will be filled in order of resolution in the regex match. If we define a value in this array, is the default value (if isn't filled by the regex matches, will have this value). -
task: The public method of the controller that we like to execute -
resource: The shortname of the controller (Error_controller => error) -
cacheable: Defines if this route can be cached
Variables
The environment vars of Butler are defined in the
/app/configuration.ini file. In it, we can
define all the vars that we need and create groups for the different
environments. The configuration result is saved in the class Fw_Register,
that provides a method called getConfig($name),
that returns the value of the config var with the name $name.
By default, the vars the we define are the vars that are in the config
block plus the variables that are in the current enviroment block
(test, prod, integration...). If the same var is defined in the
config block and in the current environment
block, the var overrides their value with the value defined in the
var of the current environment block.
Access Control List (ACL) /app/acl.ini
The access management was configured in the
/app/acl.ini file, that provides
a hierarchy of roles, resources and subresources, and their
respectives permissions.
The definition of this terms is something like:
- Role: Type of user
- Resource: Controllers Group
- Subresource: Everyone of the controllers that we have in the application
And below...the steps for made this file:
-
Inside the
rolesblock, we list all the roles that we like to provide in our platform, assign it to everyone which is their parent. If is a root role, we asign a blank value (""). -
Inside the
resourcesblock, we list all the groups of controllers that we like to create, assign it anullvalue. -
The next step is the
subresourcesblock. In it, we list all the controllers that we have in the application and we assign to which block they belong. -
The last step is create one block for every role and inside, we
list all the permissions createing strings like:
role.resourceOrSubresource.task = allow/deny- In
rolewe put one of the roles that we define in the first block. - In
resourceOrSubresourcea resource or subresource. -
In
task, one of the public methods that are inside the subresource orall, that determinates the entire set of public method that we can execute inside this resource/subresource. -
If we assign a
allowvalue, we allow the access. If we assign adenyvalue, we deny the access.
- In
Below, an example of a posible acl.ini file.
Scripts
Butler provides a place to concentrate all the scripts (CSS & JS) that
will be needed in our requests. For do this, use 4 files, 2 for the
frontend
(/app/config/frontscripts.php & /app/config/frontstyles.php)
and 2 for the backend
(/app/config/frontscripts.php & /app/config/frontstyles.php).
All the CSS that we define in this files will be included at the end of the <header>
tag and all JS just before the close of the <body> tag.
Below, an example of the content of this files:
/app/config/frontscripts.php
/app/config/frontstyles.php
/app/config/backscripts.php
/app/config/backstyles.php
Request to Response
Start /public/index.php
All the requests that receives the server are rewrited to point to the
index.php file that are present in the
public folder. Don't worry if your virtualhost
doesn't point directly to the public folder, because Butler have
another .htaccess file in the root folder
that rewrites the request to the public folder.
Root folder /.htaccess file
When we are sure that we are in the public folder, we force to execute
the index.php file. This rule only have effect
if the resource that the user solicite via URL doesn't exists, because
if the resource exists (for example a css or js file), Butler allows
the direct access to this file.
/public/.htaccess
Loading Classes /app/config/autoloader.php
The automatic class loading use the next rules:
| Type | Classname Pattern | Filename Pattern | Path |
|---|---|---|---|
| Controller | MyControllerName_Controller | mycontrollername.controller.php | /app/controllers/ |
| Model | MyControllerModel_Controller | mymodelname.model.php | /app/models/ |
| Helper | MyHelperName_Controller | myhelpername.controller.php | /app/helpers/ |
/libs/fw folder.
/app/autoloader.php file, for ensure
that all the classes can be founded for the application.
Initialize /app/bootstrap.php
After set all the global vars and define the class autoloader, the
execution path cross through the /app/bootstrap.php
file, that provide a place to define all the functions that we need
to execute for ensure a good initialization of our application. When the
bootstrap file is called, all the functions that start with init_,
will be executed in the same order that are defined in the file
Dispatching /libs/fw/class/dispatcher.class.php
We are initialized! Now, we need to dispatch our request. For this, Butler
use the Fw_Dispatcher, that is the responsable of process the request. In it,
Butler, instance the Router, the
MVC
and manage the Request Cache.
Routing /libs/fw/class/router.class.php
The Dispatcher file can't know alone which is the controller that we need for process the current request. For this, needs the help of the Router, that centralize all the route rules of our application. By default, use the next one:
http:/mydomain.com/controller/task/param1/params2/.../paramN
If we like to define another type of routing, we must to extend/modify the
Fw_Router class. If we only need to create
that some URL's have an specific behaviour, we can create custom
routes in the routes file (view Configuration/Routes).
Caching
By default, the cache is not enabled. If we like to enable id, we only need
to change the value of the cache_mode configuration var
to true, that is inside the /app/config/configuration.ini file.
When the cache is enabled, all the routes that have the cacheable
field to true in the /app/config/routes.php
file, creates a file that will be returned for all the request to this
route. This field expires in the beggining of the next hour.
All the cache files are genereted in the /app/cache folder
and contains all the request html with the exception of the debug bar. The name pattern
of this files is controller_task_Y_m_d_H_p_urlparams.cache,
where controller is the controller's name, task
the name of the method executed, Y_m_d_H the year, month, day and hour
separated by _ and urlparams the result of
separate via _ all the params of the URL that aren't part of the
$_GET.
For example:
http://mydomain.com/controller/task/2?p1=v1,
generates the controller_task_2013_07_05_12_p_2.cache file.
MVC
Controllers
The Controllers in Butler doesn't have lots of differences between the generic controller that defines the MVC. In it, we found some task, that are defined using public methods. In this methods, we can call to different Models and Views, creating the custom response that we like to solve the current request.
All the Controllers needs to extend of Fw_Controller
and needs to be placed in the /app/controllers folder.
Only for extends this class, we obtain the next execution path:
preexecutepost
The pre method can be extended and allows us
to execute a routine before the execution of the task. This routine
will be executed in all the tasks of this controller. The same
happens with the post post, that allows us
to create a post execution routine in all the tasks of this controller.
Fw_Controller methods are public,
but is better doesn't extend it, because are very linked with the
core functionalities.
Below, an example of a Controller:
/libs/fw/controller/auth.controller.php
Layouts
The Layouts are page renderization structures. In other words, every one of the different styles that have our application. By default, Butler have 3 (blank, admin and defaut), but you can create more or modify the default ones.
We can create all the Layouts that we need and for use it, we only need to assign it in the Controllers constructor (if like to have the same layout for all the tasks of this Controller) or task by task (if we need that only affects to this task).
One of the most important things to take in account is the
$html variable, that contains the
specific content of our task. In the place that we put this
variable, the view will be renderized.
/app/layouts/blank.php
CRUD Controller
Fw_CrudController is a class that extends
of Fw_Controller and offer us the
posibility to manage the registers of Database Table very easily
and useful.
Contains, principaly, 5 functions:
-
Admin:
Creates a table view that contains fields for create custom filters for show only the records that we like. This search using filters, we can use the next sintax:
- Exact Search:
= numor= 'text' - Interval Search:
> num,< num,<= num,> date... - Approximate Search:
LIKE '%text%',LIKE 'Text%'...
For configure the columns that appears in this view, we need to set the
admin_paramsattribute in the__constructmethod of our controller, that use the next sintax:Title Nis the name of the column header in the table view yfieldNis the name/alias of the field in the query that obtain the result of the table.An example of the admin view of User_Controller class(
/app/controllers/user.controller.php)
- Exact Search:
-
Edit:
An example of the edit view of the User_Controller class(
/app/controllers/user.controller.php)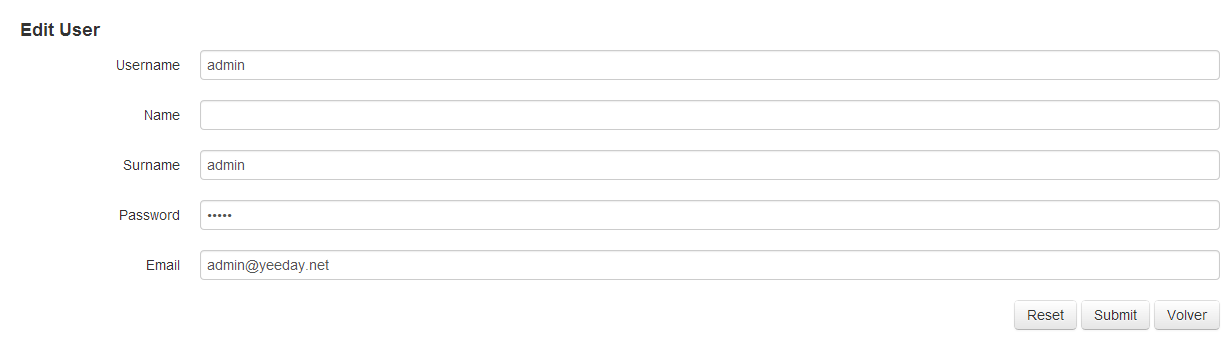
-
Add:
An example of the add view of the User_Controller class (
/app/controllers/user.controller.php)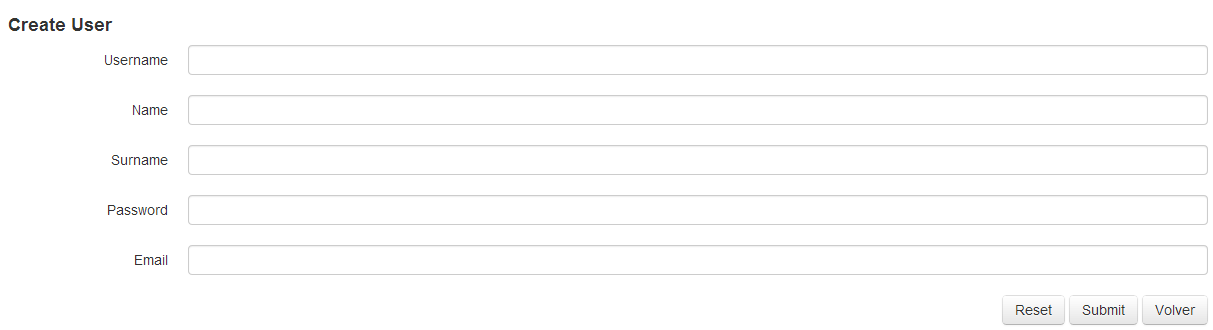
- Set:
- Delete:
/libs/fw/controllers/category.controller.php
Models
The Models, like the Controllers, have the traditional structure
of a MVC Model. In this case, we found that all the Models needs
to extend from the Fw_Model class, that
contains the basic methods for access to the table information.
This methods are:
-
delete($id) -
deleteRow($id) -
formatSelectCols($cols) -
getAclDataForSelect($field, $where) -
getAll($cols, $fetchmode) -
getData($count, $limit, $limitstart, $cols) -
getDataForSelect($table, $field, $join, $where) -
getRow($id, $cols) -
insert($values) -
setNMRelationships($nTable, $mTable, $idNTable, $aIdMTable) -
setRow($values, $id) -
update($id,$values)
/libs/fw/models/category.model.php
Views
Modules
Core Classes
Fw_Register
Butler provides a Register Pattern that allow you to store variables and objects that after you like to restore. For use it...you only need to do this:
Fw_Db
The Fw_Db class is a
factory
of database instances that provides a
singleton pattern.
If one instance is needed before, doesn't create a new one, only return
the last one.
All the instances created with this system, are part
of the PHP standard Data Objects (PDO). Said
this, you can use all the functions that provides this standard
library (more info).
For get an instance and execute a query, we need to write something like:
Misc
CCC (Combine Compress and Cache)
Butler offers the posibility of combine, compress and cache
all the JS and CSS in only one file (one for every extension).
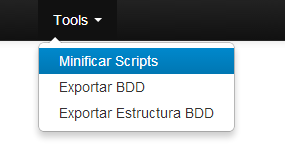
For do it, you only need to go to admin panel and do clic
in the option Minify Scripts, that
is in the Tools menu. This action
will combine all files that we defined in the scripts configuration
files (view Configuration/Scripts)
and generetes one file for every type of extension and environment
(backend and frontend).
By default, this files are generated in the next folders:
/public/javascripts/generated/front/public/javascripts/generated/back/public/stylesheets/generated/front/public/stylesheets/generated/back
minify_js and minify_css
vars to true in the
/app/config/configuration.ini file.
DB Dumper
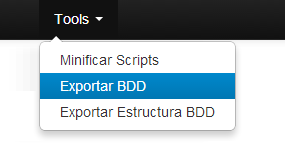
Inside the admin panel, we have the posibility to do a full
dump or a only structure dump of the default database that use
Butler (local). If you like to do dumps
of other instances, you need to change the core a little bit or
wait for the next releases.
i18n
The text internationalization of Butler is made with the PHP native function
getText(), that also can be called with the
minfied alias _(). For use it, you only need
to create one folder for every language that you like to use and, inside,
the .mo and .po files,
that are loaded inside the application in the
/app/bootstrap.php file.
For create the .mo and .po files,
you can use some applications. However, one of the most easy to use is
PoEdit,
a lightweight and multi-platform software that allow us parse all
the the application and obtain all the texts that we use automatically.
Debugging
Butler provides a Debug Toolbar that allow us to work more confortable
in local and test environments. For enable it, you only need to set
to true the debug_mode
inside the /app/config/configuration.ini file.
After that, in every request, you can view an icon like . If you click it, a toolbar with different sections will be open. Every section can be clicked for obtain more information.
This sections are:
-
Queries
In this section we found all the queries that was executed in this request, which is their status, the execution time and how many rows was affected for they.
The number in parenthesis is the total number of queries executed in the current request.
-
Memory Usage
In this section are listed all the files that we load in the current request and, in parenthesis, the max memory used for process the request.
-
Errors
When we are developing is very noisy view the notices, warning and errors in the middle of our html. For this, this section groups all of them and we can view it more easy and grouped by error type.
The number in parenthesis is the total of errors that the error handler found (
notices+warnings+fatal_errors) -
Headers
All the headers of our request.
-
Vars
In this section we found all the vars that cames with the request (
$_GET,$_POST,$_COOKIE,$_REQUEST,$_SERVER), the global vars and all the constants that was defined for process the current request. Also, here there are all the vars that we put in the Register (viewFw_Register).Sometimes is useful add variable to the Fw_Register and check their values in the debug, because using alternatives likevar_dump, we don't know exactly in which place of the DOM appears our result. -
Time
Total time that the server spends for process the request.